
How to Dye Acrylic (PMMA) Balls, Rods and Sheets
Dyeing transparent acrylic parts is unbelievably easy - once you use the correct dyes, and the right conditions. Having conducted occasional internet searches for years, hoping that someone would have the answer, I finally really needed to dye some acrylic balls, so had to do the work myself. To save you from having to go through the same trouble, here's how to dye acrylic balls and other acrylic parts.
[skip to the step by step instructions]
Buying coloured balls is a perennial problem for us - you may think that there are millions of different balls available out there in every size, colour and material that anyone could want. Well, if there are we don't know who has them - we use some UK and EU stockists for whatever coloured balls they hold, but what they hold is necessarily limited.
This is because ball manufacturers tend to produce balls to order for a specific customer, and the stockists get whatever is left over after those orders are fulfilled. The good news is that, if I want a hundred 7.00mm green acrylic balls, I can easily find a manufacturer willing make them for me. The bad news is the minimum order quantity (MOQ) for balls of that size is typically around 70,000, meaning that I end up having to hold 69,900 balls in stock. In reality, we use a lot of 7.00mm balls, so those balls will last us a couple of years, but we will use them. Where the MOQ becomes a problem for us is with larger balls - we use far fewer of these, so we can't justify buying in, say, 50,000 bright orange acrylic balls when we might only use a few dozen every year. That leaves us restricted to using whatever balls the stockists hold. That became a serious issue for us about a year ago - we were making a series of stunning models for chemists in Germany, using beautiful deep transparent blue 18mm diameter acrylic balls.
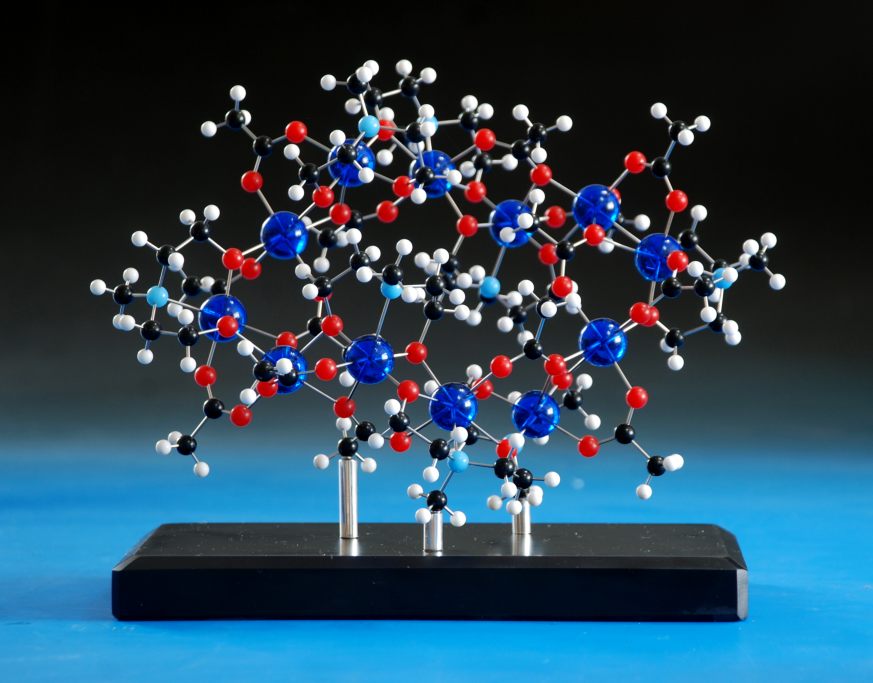
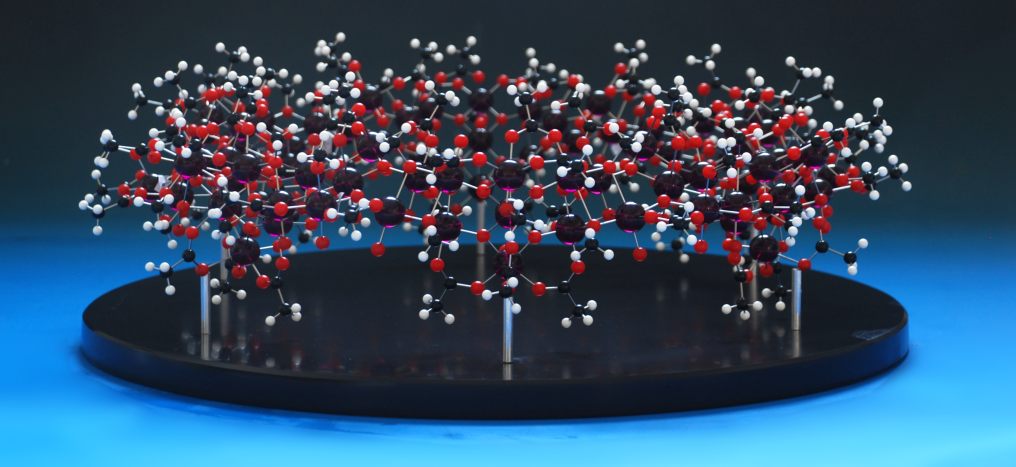
The last one in the series was ordered - a huge crown assembly of ligands and metals - and I was planning to use 72 of the blue balls to make this up.That's when disaster struck - the stockist had only around fifty balls left, and neither we nor they could find any more, anywhere on the planet. Thankfully, the customer wanted a different colour anyway, so we bought in eighty purple balls (we mis-drill sometimes, and it's always safer to have too many than to assume everything is going to go perfectly) and made the model up:
 ,
,
When we need opaque coloured polymer balls, we use balls made with phenolic resin, thermoset plastic, or acrylic (PMMA), and these tend to be available in most common colours (black, blue, red, yellow, violet, orange, green, etc.), which covers the vast majority of models. Thermoset green, for example, can be different from the phenolic green, without any other perceptible difference in the surface appearance, so that extends our available colour range slightly. In the worst case, where a customer absolutely needs a very specific colour, we can call on an excellent local spray painter to colour the ball to any RAL or Pantone colour.
The story is different with coloured transparent acrylic balls, though. Until about eight years ago, we could easily dye clear acrylic balls using Rit fabric dyes - you put the dye in water, bring it to the boil and add the clear acrylic ball. Half an hour later, the ball was coloured, and whether the customer wanted a model made with one or a hundred turquoise acrylic balls, we could make them in one batch (to ensure colour uniformity) and make up the model. And then, I assume, Rit changed their dye formulations any no colours would fix in the acrylic - at first I blamed the new batch of balls, but when I tried with some older stock, they failed to dye, too. Every dye I tried failed to work - for the last few years, I've tried almost every readily available dye with virtually no success. Some dyes gave a slight tint, but nothing like the rich colours we needed. I then remembered I was a) a chemist b) a physical chemist and c) I'd taught an entire lecture course on the physical properties of polymers. So, I started to look at the problem more methodically.
My first assumption was that the dyes needed to chemically bond to functional groups in the PMMA, but it soon became clear that this wasn't the determining factor. while this may explain why some dyes failed to colour at all, other dyes that should have bonded just gave a weak colour.
After some more research, it became clear that the problem is physically inserting the dye molecules into the PMMA matrix. PMMA is a polymer and, like many polymers, may display a crystalline or an amorphous structure. Crystalline polymers are like packs of dried spaghetti - long units, tightly packed with almost no space between them. PMMA is almost always found as an amorphous polymer and, like other amorphous polymers, can be usefully compared with a bowl of spaghetti - twisted strands that are imperfectly packed with small spaces between them. And there's the issue - the dye molecules need to fit in those spaces, but they are too small to accommodate the large molecules that make up the commonest organic dyes. The solution was obvious - we needed to use the smallest dye molecules that we could find.
Disperse dyes
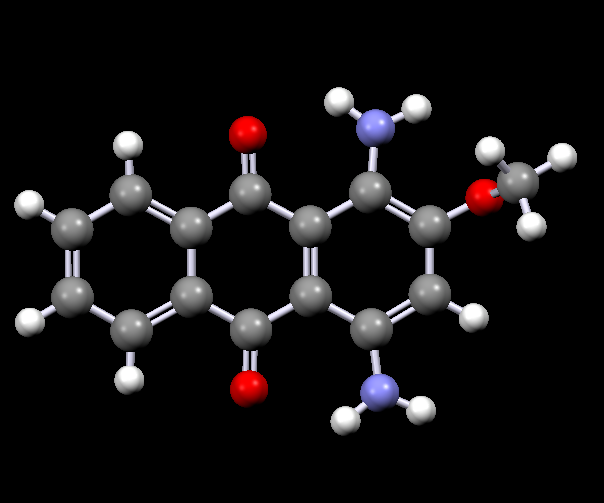
Disperse dyes are a group of very small water-insoluble dyes that are available in a wide range of colours, for example:
 |
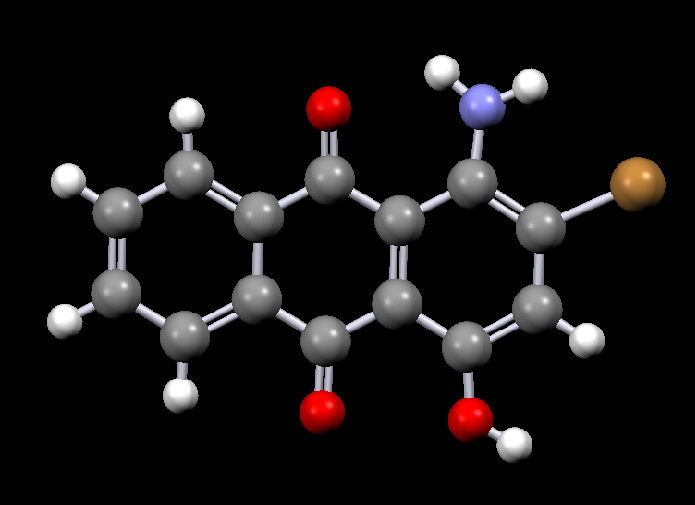 |
| Disperse Red 11 | Disperse Violet 17 |
These dyes, it turns out, are small enough to get into the molecular pores between the chains in PMMA, and my first attempts at dyeing PMMA balls, done using red dyes, turned out to be quite successful - simply boiling the ball in an aqueous suspension of the dye was enough to get obtain a nice, rich, red colour. Buoyed by that positive result, I bought more disperse dyes in green and put them aside until I needed them. Unfortunately, though, when I actually needed them, I found they acted relatively poorly - certainly, they were better than any other dyes I'd tried, but the colour was nowhere near rich enough to use for models that we would want to sell. After that, I spoke with Paul Sadgrove from Kemtex, where I'd bought the dyes who provided an interesting insight into the problem - to simplify the argument, if you want a blue dye, you need to absorb red light, and to get a red dye you need to absorb blue light. Red light has a longer wavelength than blue, and generally requires longer molecules to absorb (a real-life application of the quantum mechanical particle in a 1d box). But we already know that we're dealing with getting molecules into very small pores, so it seems that the larger molecules required for blue and green dyes are difficult to force into the PMMA matrix. So, although we're already using boiling water, we need higher temperatures to force the molecules into the PMMA. Luckily, there is a readily available solution for that - we use a pressure cooker. After some experimentation, this is how I dye acrylic balls for our molecular models:
Step by step process for dyeing solid transparent acrylic balls, rods and sheets.
Materials
You will need the following:
1g of a disperse dye of your chosen colour
500ml of boiling water
Acrylic to be dyed
Pressure cooker
Method
You need to ensure that you are buying disperse dyes - other dye types almost certainly won't work and, even if they do, are likely to give unreliable or poor results. We buy our disperse dyes from Kemtex in the UK. Doubtless other countries have their own suppliers.
Any basic pressure cooker will do, it doesn't need to be an all-singing controlled unit running on dilithium crystals - you only need to get the water temperature up to around 105-110°C to get the dye into the acrylic. The one we use for our balls is a very basic one that cost £16, including postage, from ebay.
1. Add the water to pressure cooker and then add the dye. Ensure that the water is deep enough to completely cover the part. If there is not enough, multiply up the quantities of water and dye until they do, but never use more than your pressure cooker can safely contain. Stir the water to completely disperse the dye.
|
|
2. Turn on the heat and bring the water to boiling point.
|
|
3. Once the water is boiling, add the acrylic parts that you wish to dye.
|
|
4. Fix the lid of the pressure cooker in place, drop the heat to the minimum required for the pressure cooker to operate and leave to dye for the required period. This is where you need to allow for some uncertainty - we normally find that 15mm diameter acrylic balls require just 10 minutes for some colours and up to 20 or 30 minutes for others. You should aim to boil the balls for the minumum amount of time required to get the colour depth you want - longer processing times seem to result in a cloudiness in the ball that may not be desirable. Stopping the dyeing, checking the acrylic. If colour consistency is important to you, you should either process all the acrylic parts you need in one operation or, if you have to work in batches, you should exactly reproduce the processing of the first batch in every subsequent one.
|
|
5. After the acrylic has been processed for as long as you need, stop the pressure cooker using the method appropriate for your equipment, and take out the acrylic parts.
|
|
6. After removal, the acrylic parts should be rinsed in cold water and dried with a paper towel or similar - this is not essential, but it prevents you from adding dye spotd to everything in a 5 metre radius.
|
|
7. That's it. You're done. You should now hold a nicely coloured acrylic part. Note, though, that the dye will only colour the outer millimeter or so of the part - I guess that, if I processed acrylic in a more dilute suspension of dye for many hours, the dyeing would be more uniform, but I have yet to run that experiment.
|
|
Drop me a line if you have any questions, or comments to make - [email protected]

